
This document provides a summary of how the MyPBX can interoperate with Gigaset pro IP DECT Cordless system N720 IP Pro. This is a Gigaset pro “self-certification” document based on own testing with the MyPBX.
This guide has been tested with follwing firmware versions:
- N720 Version 92
- MyPBX Version
Step1: Configure SIP User on the MyPBX system
a) Login to the PBX by entering the IP address of the PBX into your Browser

Go to PBX --> FXS / VoIP Extensions and press on the "Add Extension" button
Default User = admin
Default Password = password
b) Add a new VoIP extension

Go to PBX --> FXS / VoIP Extensions and press on the "Add Extension" button
Configure the VoIP extension

| PBX | N720 |
|---|---|
| Type: SIP | -- |
| Extension: 310 | Username:310 |
| Register Name: 310 | Authentication name:310 |
| Password:Bnnvsc517 | Authentication password: Bnnvsc517 |
| Name: N720 Tiptel | -- |
Please press "SAVE"

It is necessary to apply the changes.
Step 2: Configure the PBX directory
MyPBX is using a LDAP server as Database for the directory.
a) Go to System / LDAP Server / LDAP Server

Set the checkmark to enable the LDAP server.
You don´t have to change the settings for using the diretory with a Gigaset DECT system.
The IP of the LDAP server is the same as the IP of the PBX.
| MyPBX | Gigaset |
|---|---|
| Enable LDAP | Enable directory |
| PBX Node | LDAP search base (BaseDN) |
| User Name | Common username |
| Password | Common password |
b) Add a new entry to the directory
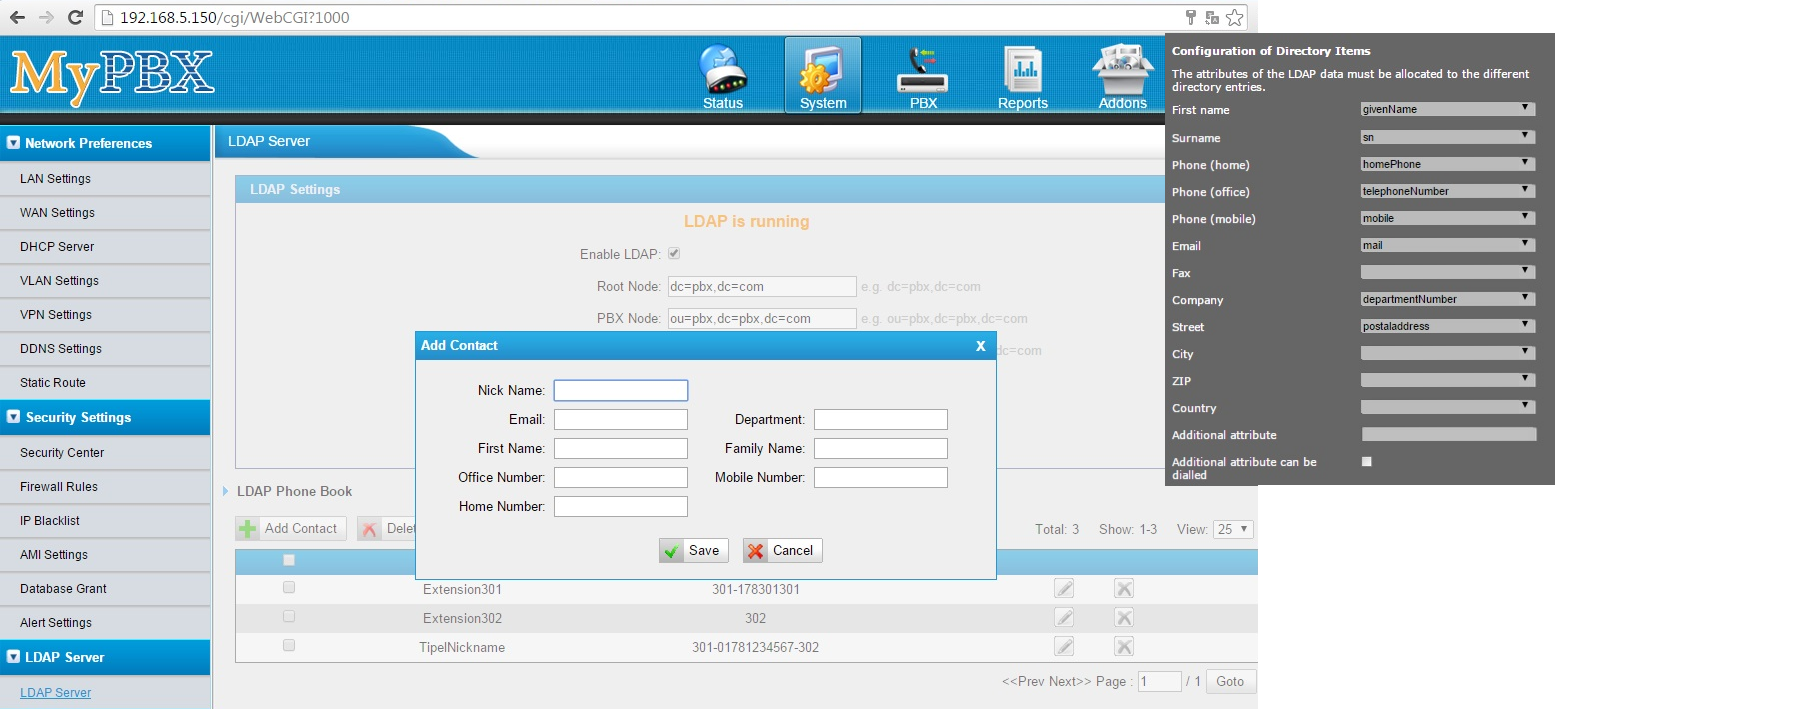
Database attributes
| MyPBX | LDAP |
|---|---|
| Nickname | cn |
| Department | departmentNumber |
| First Name | givenName |
| Family Name | sn |
| Office Number | telephoneNumber |
| Mobile Number | mobile |
| Home Number | homePhone |
Step 3: Prepare the N720 to register new handsets and VoIP accounts.
Careful planning of the DECT wireless network is the prerequisite for successful operation of the Gigaset N720 DECT IP Multicell System with good call quality and adequate call options for all subscribers in all the buildings and areas belonging to the MyPBX. When deciding how many base stations are needed and where these should be positioned, both the requirements for the capacity of the MyPBX and its wirelss coverage as well as many ambient conditions, must be taken into consideration.
The "Gigaset N720 DECT IP Multicell System- Site Planning and Measurement Guide" will make it easier for you to plan your multicell DECT network.
a) Login to the N720 WebUI by entering the IP of the N720 into a browser
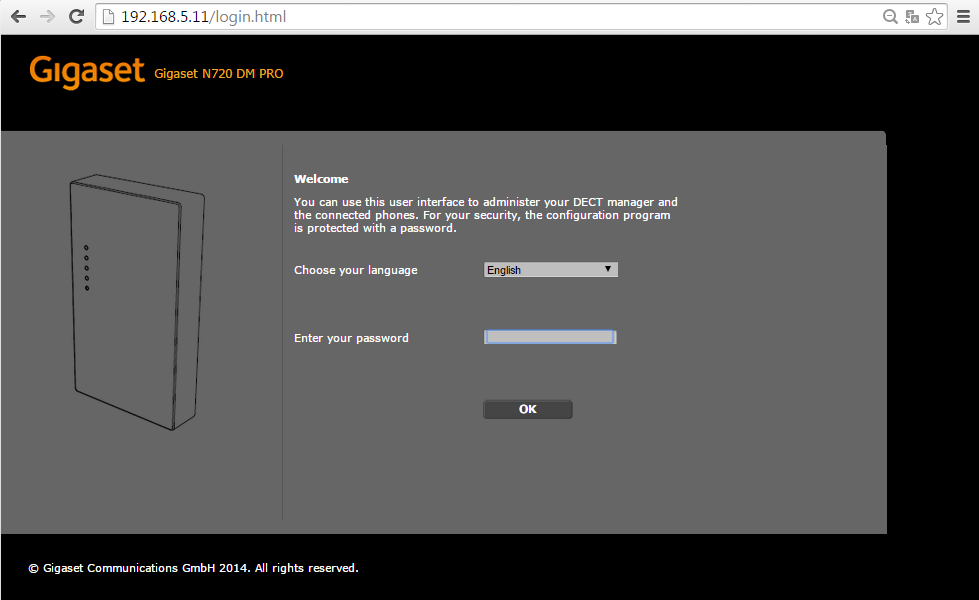
default password : admin
Hint: A internet connection is necessary to change the language
b) Configure the network
Settings/Network and Connections/ IP Configuration

c) Register new DECT basestation / transmitter to the system
Settings/ Network and Connections / Base Station Registration
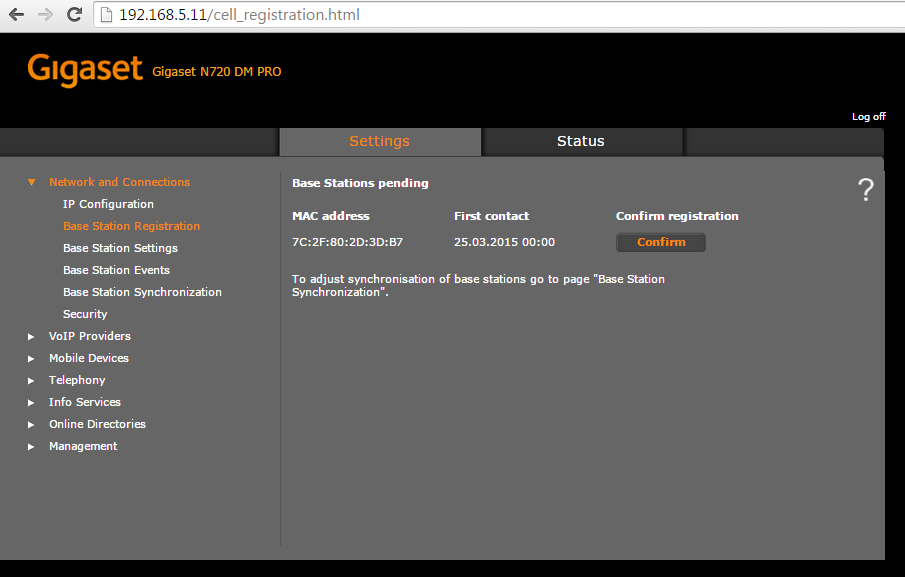
To register a new basestation press the "Confirm" button
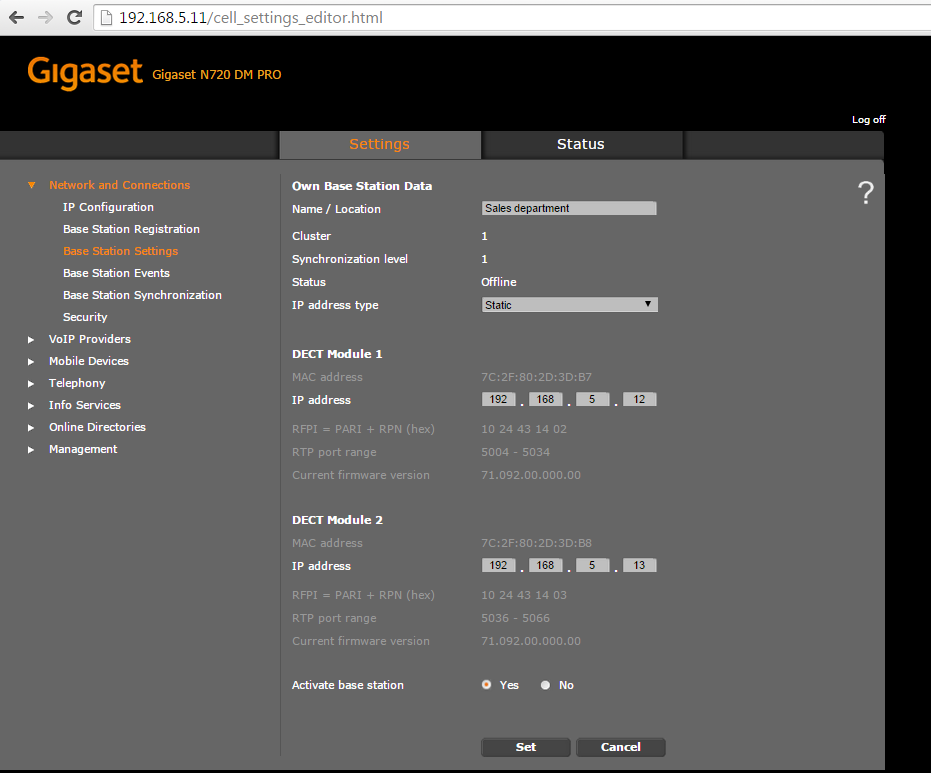
Enter a reasonable Name/ Location and set the IP settings.
d) Add a new VoIP Provider
Settings / VoIP Provider

To add a new provider pess the "Edit" button of the first account.

| Provider | MyPBX |
|---|---|
| Domain | PBX IP example: 192.168.5.150 |
| Proxy server address | PBX IP example: 192.168.5.150 |
| Proxy server port | 5060 |
| Registration server | PBX IP example: 192.168.5.150 |
| Registration server port | 5060 |
| Registration refresh time | 180 |
| all others | default |
Don´t forget to press "set" to save the settings
e) Change the advanced VoIP settings
Settings/ Telephony / Advanced VoIP Settings

| Automatic negotiation of DTMF.. | No |
| Send settings of DTMF ... | RFC2833 |
| all others | default |
f) Change the local settings
Settings/ Management / Local Settings

| Country | Germany |
| Tone schema | Germany |
| all others | default |
Step 4: Now we will add the MyPBX directory(LDAP) to our DECT System
a) Configure the LDAP director
Settings/Online directories

| Directory Name | MyPBX directory |
|---|---|
| Enable directory | set checkmark |
| Server address | MyPBX IP example 192.168.5.150 |
| LDAP searche base | ou=pbx,dc=pbx,dc=com |
| Common username | cn=admin,dc=pbx,dc=com |
| Common password | password |
| Name filter | (|(cn=%)(sn=%)(givenName=%)) |
| Number filter | (|telephoneNumber=%)(mobile=%)(homePhone=%)) |
| Display format | %sn,%givenName |
| First name | givenName |
| Surname | sn |
| Phone(home) | homePhone |
| Phone(office) | telephoneNumber |
| Phone(mobile) | mobile |
| Company | departmentNumber |
| Street | postaladdress |
Don´t forget to press the "set" button to save
Step 5: Register new handset / VoIP account
a) register Hanset to DECT system
Settings / Mobilte Devices
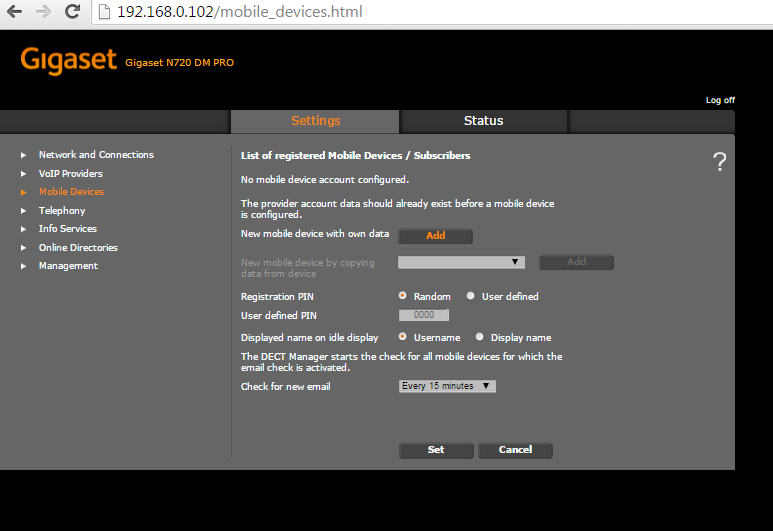
Click on "Add"

To start the registration click on "Start registration "

Start the registration on your handset and enter the registration pin

Pop up appears if registration was successfull

Now you have to add the MyPBX extension settings
| N720 | MyPBX |
| Authentification name: 310 | Register Name : 310 |
| Authentification password: Bnnvsc517 | Password: Bnnvsc517 |
| Username:310 | Extension :310 |
| Display Name: Up to you | --- |
Click on Show advanced settings to start the last settings
b) advanced settings ( Voicemail / MWI / directory access / autolookup)
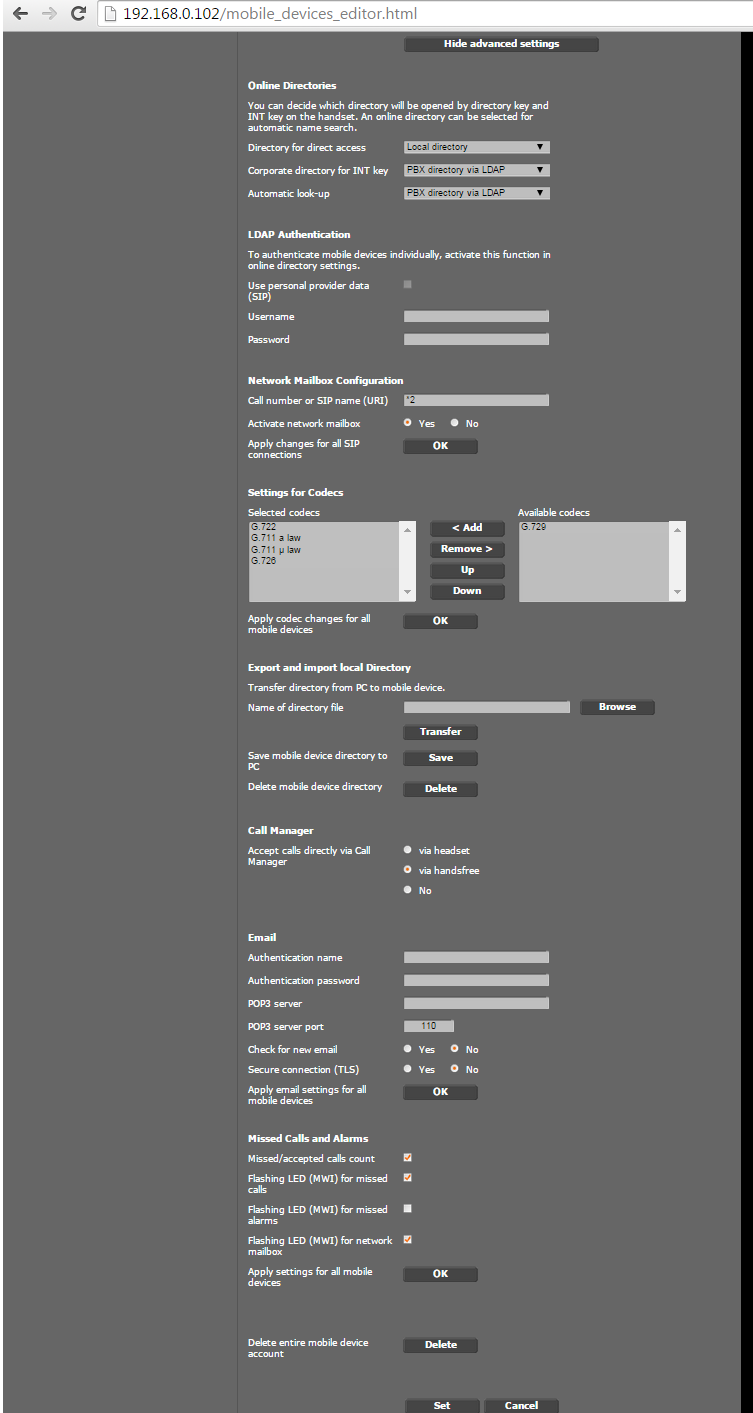
| Corporate directory for INT key | PBX directory via LDAP |
| Automatic look-up | PBX directory via LDAP |
| Call number of SIP Name(URI) | *2 |
| Acticate network mailbox | set radio button |
| all others | default |
IMPORTANT: click "set"
Step 6: Check the registration
